Who is HelloFax?
HelloFax has very conveniently removed the need to own a physical fax machine by removing the paper. So, even if
you can't be free of faxes at least, you can be free from the struggles of using a fax machine. Faxes can be
sent and received online with the help of HelloFax so, it is a win for everyone. It has reduced you the hassle
of waiting endless hours for fax to arrive, which includes the process of confirming whether it was sent, or not.
The fax now directly comes to the inbox of the recipient, and outgoing faxes are sent online. Everything is done
from the comfort of your computers.
It is convenient for everyone because of the simple procedure and the fact that not much has to be done.
The faxes can be sent endlessly to the same number. This means, you transfer your numbers to us and can
start receiving electronic faxes without the risk of losing them.
US, UK and Canada fax number https://app.hellofax.com/
How to setup?
#1. on HelloFax's side
For already registered customers; connect your HelloFax web interface
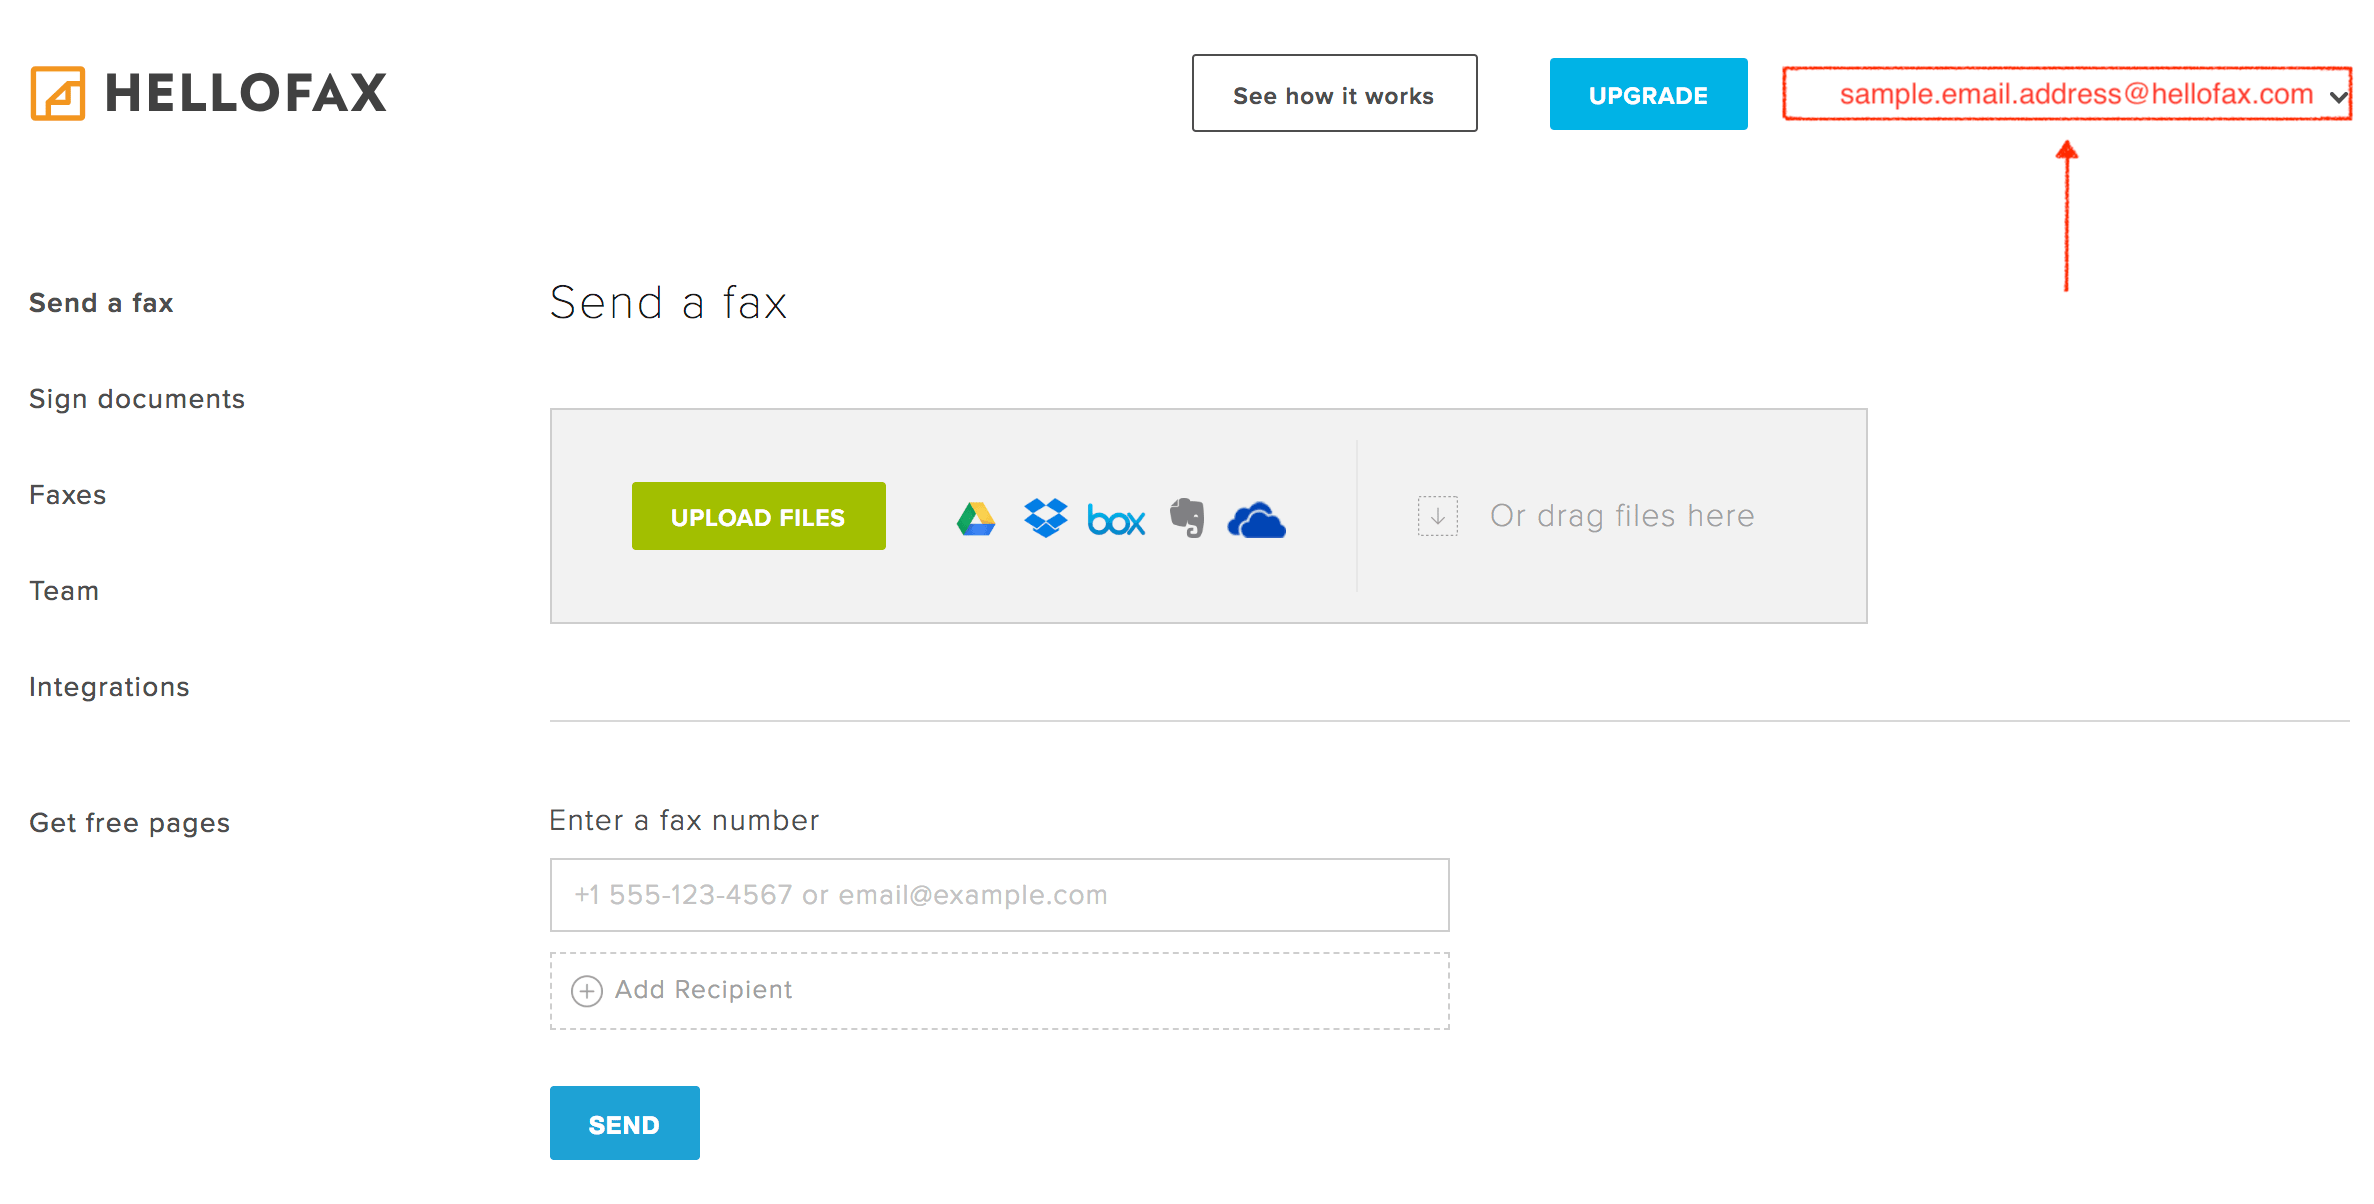
- On top right of the screen you can read the email which will receive your fax
- You can set the fax notifications to receive by email. For more understanding, take a look at HelloFax admin center »
New customers should navigate to www.hellofax.com and click the 'Get Started' button.
-
1. Users will then need to enter an email address where an activation link will be sent.
2. Users should then navigate to their email and click the 'Verify your email address' button in the HelloFax Account Activation email.
3. Users must then create a password that they will use to log-in to their account in the future.
4. Users will then be presented with the HelloFax Admin page where they can send faxes
#2. on Automatic Email Manager's side
- If Automatic Email Manager is not installed on your PC, just download and install »
- Click on 'Accounts', then 'Add account'
- Enter the email address you wish to receive your HelloFax faxes on and follow the given instruction on screen
- After the account is ready, add the action Print Attachment(s)
- You can also add conditions to avoid spam (see below in the tips section)
3 Best tips to improve your experience with digital faxes
#1. Avoid spam, print fax
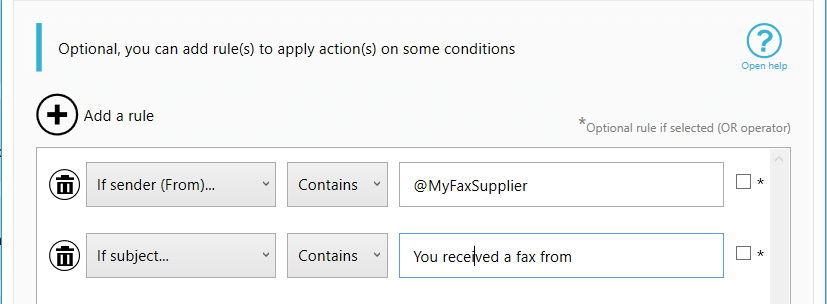
You can filter your conditions in your email settings in a way to ensures that your received email is
entirely under HelloFax and any mail without a subject or keywords will not be printed. Just add this rule:
sender email contains noreply@mail.hellofax.com) and/or subject which contains "HelloFax - Incoming fax from".
The picture below tells you how to filter your conditions. (Read more on possible conditions »):
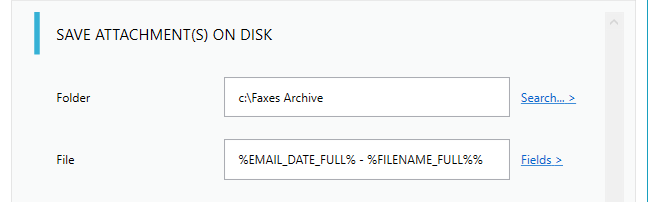
#2. Save a copy of your faxes for archiving
Keep your faxes saved for backup and archiving purposes, you need to save faxes on a disk. With Automatic Email
Manager, it becomes really easy because after the print action you can 'save attachment' and save it in a specific location.
Read how to save the file on disk ».
#3. Send a fax to reply an email or a fax
Most times, you have to send a fax as confirmation that you have received a specific email. You can easily send
your fax in a PDF format through HelloFax digital fax account.
In the box for 'TO:', you have to write the fax number. The fax number is written like this: for instance,
if you are sending the fax to a U.S. number, type 1, then the ten-digit fax number, as follows: 19992345678@hellofax.com.
Note: Email should be sent from the HelloFax email account only.
Here is how you reply to fax: Choose the option that requires to reply to an email and attach the fax file
attachment. Now every time a fax is received, it will be sent to the number you have provided. You can
contact us for more information on this setting ».
